Monday, November 9, 2015

French Bread, Chicken Pockets and Cinnamon Rolls

I got this wonderful bread recipe when I married into the Jolley Family.  It is called 2 Hour French Bread and it is super easy. I always made French bread out of it and then one day I decided to make cinnamon rolls out of it.  I used the dough for scones and breadsticks as well.  One day, I had a bright idea. I loved though chicken pockets made with pop and fresh croissants but with a big family and on a limited budget I thought maybe I could make the same recipe with my French bread.  Wow did they turn out so much better than with the store bought rolls. 

This recipe is just stirred together.  In the picture above, it looks kind of a mess.  I promise you, if you will follow the recipe exactly it will turn out every time.  And you can use it for anything you would like!
Can you believe that is even the same bread as in the first picture.  It makes the most wonderful dough to work with. Anyway, make it into bread or rolls, or fill it with anything you can imagine. I will share some ideas with the recipe.  It's long so take a minute to look through all the ideas.
 Roll out for cinnamon rolls or orange rolls or even add raspberry jam to make sweet rolls.
 I spread butter over the dough and then sprinkle with cinnamon and sugar.  Then I roll them up!
 Place on a sprayed pan.  I usually put them a little closer together than I did tonight!
 Let raise until double.  Bake at 400* for about 14 minutes!

Cool the rolls and then frost with your favorite frosting.

CHICKEN POCKETS:
 Mix together the cream cheese, onion, salt, pepper, melted butter and milk with a mixer
It will be very creamy and yummy!
 Add in the cubed chicken and mix it well


 Roll the dough out like for the cinnamon rolls and cut into about 3-4 inch squares.  Put a big spoonful of the chicken cream cheese mixture in the center.
Bring opposite corners of the dough up and pinch them together into little pockets. Roll them in melted butter and then in a mixture of Italian Style bread crumbs and Parmesan Cheese.

Bake at 400* until golden brown and hollow sounding when you thump on them.  (Around 16-20 minutes)

 
I make a gravy out of the chicken broth from when I baked the chicken but you can make your own gravy or use a can of Cream of Chicken soup. Anyway, these are little pillows of heaven that can bring comfort on a stormy winter night.  I hope you enjoy!


2 Hour French Bread


6 Cups Flour                                                                           1 Tbls. Salt

1 Pkg (or 1 tbls) Yeast                                                            1/3 cup Oil

3 Tbls. Sugar                                                                           2 1/2 Cups Hot Water


Mix the 3 cups flour, yeast, sugar and salt.  Add the water and the oil.  Mix together with a spoon and then add 3 more cups flour. Leave spoon in the bowl and stir down every 10 minutes for a total of 50 minutes.  Dough is ready to use.  Roll into bread loaves and let raise until double.  Can brush with whipped egg white for a crustier crust.  Bake at 400° for 20 minutes.   Makes 2 loaves French bread.


Chicken Cream Cheese Pockets


1 8-oz. pkg Cream Cheese                                                    4 Tbls. melted butter

4 Tbls. Milk                                                                              2 Tbls. grated onion

1/2 tsp. salt                                                                              1/4 tsp. pepper

4 cups cubed cooked chicken                                                Melted butter or margarine

Italian seasoned breadcrumbs.


Mix with a mixer all of the ingredients except the chicken, bread crumbs and butter to roll the rolls in.  Add the chicken and stir together.  Roll the dough like for cinnamon roll except thinner.  Cut into 4-inch squares.  Put a spoonful of filling in the center of each square.  Pull up opposite corners and seal well.  Dip in melted butter and then in breadcrumbs.  Put seam side down on a cookie sheet.  Do not let rise.  Bake at 400° for 16-20 minutes.  Serve with chicken gravy over the top.
 
 
Pizza in a Loaf

1-1/2 lbs. lean ground beef or sausage                      1 minced onion
1 can or jar of your favorite pizza sauce                    grated cheese
Any other pizza toppings

Brown meat & onion until done.  Drain.  Add pizza sauce and mix together.  Roll bread dough to fit into a greased jelly roll size cookie sheet.  Put meat mixture down the middle 1/3 of the dough.  Add any other pizza toppings you like and cheese.  Make 1 inch slits diagonally about 1 inch from the filling to the edge.  Fold over edges left side then right side and repeat until completed.  Do not let rise.  Bake immediately at 400° for 16-20 minutes.  Serve hot.

Stroganoff Pockets

1 lb. lean ground beef                                                             diced onion
1 can cream of mushroom                                                     1/2 cup sour cream
Italian seasoned bread crumbs                                               melted butter

Brown beef and onion.  Drain.  Add soup and sour cream. Cool.  Roll out bread and cut into 4-inch squares.  Put a spoonful of mixture in the center of each square (can use grated cheese too).  Pull up opposite corners and seal.  Dip in melted butter and bread crumbs.  Do not let rise. Bake at 400° 16-20 minutes.
 
Breakfast Pockets

Scrambled eggs                                                                      ham or bacon
Grated cheese                                                                        any other toppings

Roll bread out and cut into 4-inch squares.  Layer with egg, meat, cheese, etc.  Pull up opposite corners and seal.  Place seam side down.  Do not let rise.  Bake at 400° for 16-20 minutes.
Sloppy Joe Pockets
Roll out bread and cut into 4-inch squares.  Fill with your favorite sloppy joe mixture.  Pull up corners and seal.  Bake, seem side down, 400° 16-20 minute.
 
Taco Pockets
 
Taco filling                                                                               grated cheese
 
Roll out bread dough and cut into 4-inch squares.  Fill and seal.  Bake at 400° for 16-20 minutes.  Can serve with an enchilada sauce over the top.


Parmesan Rolls
Melt butter or margarine and mix in grated Parmesan cheese.  (Consistency should be like pancake batter).  Make rolls about the size of a large walnut.  Roll in the cheese mixture so it is completely covered.  Put on pan and let rise until doubled.  Bake at 375° for 15-20 minutes or until golden brown.
 
Orange Rolls
1 Cube Butter or Margarine, softened
1 Cup Sugar
Grated Orange Rind (Fresh)
 
Mix butter and sugar (Do not melt butter).  Add the grated orange peel and mix. Make rolls the size of large walnuts.  Put a dab of mixture on the top of each roll.  Let rise until double.  Bake at 375° for 15-20 minutes.  NOTE:  Sugar will burn if you are not careful.  It is helpful to use a coated baking sheet.


Saturday, September 5, 2015

Heavenly Blueberry and Cream Angel Dessert


So my kids gave me some fresh blueberries from their Bountiful Basket.  I figured that I needed to make something yummy with them.  I had my family coming for a shish-ka-bob party last night so I got onto Pinterest to find a recipe.  Thanks to "Mel's Kitchen", this is what I came up with.  Man O Man is it yummy.  The best part about this recipe is that you could use any fruit that you would like.  Raspberries and/or peaches is my thought.  Any way, I didn't do step by step photos because I was in a huge hurry but the recipe tells you how to put it all together. 
I did add a little extra water to the blueberry compote to make it not quite so thick and I'm glad that I did.  Give this a try.  It looks fancy for any party and tastes so good!


Heavenly Blueberry and Cream Angel Dessert

YIELD: SERVES 8

INGREDIENTS

Blueberry Filling:

·         12 ounces frozen blueberries

·         2 tablespoons granulated sugar

·         2 tablespoons cornstarch

·         1/4 cup cold water

·         Squeeze of fresh lemon juice (about 1/2 tablespoon)

Cake and Cream:

·         Baked, cooled and cubed angel food cake (see note)

·         16 ounces light cream cheese, softened to room temperature

·         2/3 cup half-and-half or evaporated milk (can use skim evaporated milk)

·         2/3 cup granulated sugar

Whipped Cream:

·         1 1/2 cups heavy cream

·         3 tablespoons powdered sugar

DIRECTIONS

1.     For the blueberry filling, in a medium saucepan, combine the blueberries, sugar, cornstarch, water and lemon juice. Bring the mixture to a simmer and cook until thickened, 5-7 minutes, stirring often. Remove from the heat and let cool to room temperature.

2.     For the cake and cream layer, in a blender or with an electric mixer (handheld or stand mixer), whip together the cream cheese, half-and-half or evaporated milk and sugar until smooth and creamy. Transfer the mixture to a bowl if you used a blender. Fold in the angel food cake cubes. Keep in mind (from the note above) that you may not use all the cake cubes, especially if using an angel food cake mix. Add cake cubes until they are all thickly coated with a layer of cream. If making this in advance, it can dry out if there is too much angel food cake added.

3.     For the whipped cream, beat together the heavy cream and powdered sugar until peaks form.

4.     To assemble, in a trifle dish or in a large glass bowl, spread half of the angel food cake mixture. Top with half of the blueberries, spreading evenly across, and then spread half of the sweetened whipped cream. Repeat the layers.

5.     Cover and refrigerate at least 2 hours or up to 24 hours. Serve chilled.

Saturday, August 15, 2015

Mae's Baking Powder Biscuits


So my guy was talking about what to make for breakfast this beautiful, Saturday morning and said that biscuits and sausage gravy sounded really good.  Well, short of going to a restaurant and spending more money than we wanted to, I decided to spoil him with some made from scratch biscuits and gravy. I though that as long I was spoiling him, I should take pictures to share with all y'all.  So here ya go!

This recipe is my Aunt Mae's, my mom's sister's recipe.  She was a wonderful cook and though she has been gone for many years, her biscuits are alive and well at the Jolley home.  I love this recipe. Hope you will too!

Start by mixing all of the dry ingredients together. I didn't show the ingredients so forgive me.  Cut in the shortening until crumbly and then add the milk.  Mix until just incorporated - it will be sticky!
Pour it out onto a floured countertop.  Pat a little flour around it so you can handle it BUT DO NOT handle it too much!


Pat out the dough with your fingers to around 3/4 inch thick.  Cut into circles. I just used the top of a drinking glass. Now this picture doesn't show very many.  I only made a half batch of dough and I cut them a little larger than I usually do.
Place them on a lightly greased or sprayed pan.  Now I want you to see that little bit larger biscuit in the upper right hand corner of the picture. Well, when all of the biscuits have been cut and you have that little bit of dough left over, you just kind of work it with your hands into a loosely put together round. I'll tell you about that one in the next part!
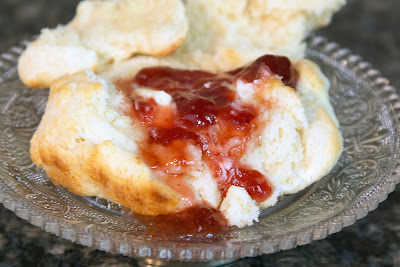
Look how beautiful they are and believe me, they taste beautiful too.  Okay, see that loosely put together biscuit, now in the upper left hand corner. Well, this is how I remember it as a kid.  My mother used to always get that biscuit. Now I never ever asked her why she took that one but I have a couple of ideas.  I think she took that biscuit because she didn't think it might be as good as the others because it kind of falls apart.  That's what I think but let me tell you why I have dibs on that one. I am a little selfish when it comes to that biscuit.  It is my favorite.  It is the biscuit that just falls apart and that's why I love it. I take each little piece and slather it with butter and jam or honey.  MMMMM- it's the best!
Well, here's the final product.  Homemade sausage gravy over light as air biscuits.  Of course, they had to be served with hand cut home fries, Right? 
And my big, fall apart biscuit???  Well, as they say, a picture is worth a 1000 words.   Enjoy! Because I did for sure!  Happy baking!


Mae's Baking Powder Biscuits

2 cups Flour
1/2 tsp. Salt
4 tsp. Baking Powder
1/2 tsp. Cream of Tarter
2 tsp. Sugar
1/2 cup Shortening
2/3 cup Milk

Mix the dry ingredients together.  Cut in the shortening until it is crumbly.  Stir in the milk with a fork until just combined. Dump out onto a lightly floured counter top.  Pat to about 3/4 inch thick.  Cut into circles and put on a slightly greased pan.

Bake at 450* for 12 minutes or until golden brown.  Do not overbake.

Wednesday, July 8, 2015

Super Good Baked Beans

I decided that I should add this recipe as well.  My mom, also made really yummy baked beans.  I loved them but maybe not as much as I love baked beans now.  A few years back, our family, along with my parents, made a cross country trip from Kansas City, to Williamsburg, to Maine, across New Hampshire and Vermont, stopped in Illinois and back to KC.  Long story, short, we ate a a place in KC called Zarda BBQ and I fell in love with their beans.  I have tried to recreate the taste.  Not sure if I have done that or not but I like the beans.  So here is a basic version of my mother's recipe, tweeked a bit.  After I share this recipe, I will also tell you how I do the short-cut but still really good version.
So, here goes!

First cook up some good old bacon (sorry I don't have a picture of the bacon cooking) I have decided that bacon is one of those things that I really never want to have to give up.  I love everything about bacon. Anyway, cook up your bacon til crispy and then crumble into piece.


Once again, I use onion.  I really love onions and cook with them a lot! Add some onion and some green pepper to about 2 Tbls. bacon grease.  Saute them until the onion starts to look translucent.

Add 2 cans of pork and beans that have been drained a bit (I don't love them too runny so I just squeeze out some of the tomato sauce that comes on them) and remove the fat pieces from the top of the beans.   Add the ketchup, brown sugar, molasses, dry mustard and worchestershire (how do YOU say that "W" word?) the liquid smoke and the hot sauce if you want hot sauce in your beans.  That is optional.  Mix all together!

Add the bacon.  I tend to use a lot of bacon because I love the meatiness and flavor it gives the beans.
Mix together and pour into a casserole dish. Cover with foil and bake at 350* until they are hot and bubbly.  Serve.  These are so good.

If you like the flavor of these, here is a little secret.  You can make just the sauce without the beans, onion, pepper and bacon and use it as BBQ sauce with pulled pork.  I do it all the time and my family loves it.  I serve it warm and it is so so so good!!!

So here is a picture of our 4th of July picnic.  The beans with that potato salad and a burger- WOW!!! Yummy!

Baked Beans

Cook 6 slices of bacon until crispy (more if you like :)) crumble when cooled

2 cans pork and beans, drained
1/4 cup chopped onion
3 Tbls. chopped green pepper
2 Tbls. bacon grease

Saute until onion starts to look translucent.  Add:

1/8 cup +1 Tbls. dark molasses
3/4 c ketchup
2 Tbls. Worchestershire sauce
1/2 cup brown sugar
3/4 tsp. dry mustard
1/4 tsp. liquid smoke (more if you like them a little more smokey)
1/2 tsp. Franks Red Hot or your favorite hot sauce (opt)

Mix all together and add the crumbled bacon.  Pour into a sprayed (for easier clean up) casserole dish and cover with foil.  Bake at 350* until bubbly and hot.  Serve!


So I told you there is a short cut version too.  So here goes!  Again, remember I don't measure! This is usually how I roll.

I use the 2 cans of pork and beans or more if I'm going for a larger crowd.  I do use the bacon and I do saute the onion and green pepper in the bacon grease.  Then I start dumping in ketchup, hickory flavored bbq sauce, a splash of worchestershire sauce, some brown sugar to taste-(and I do taste and add more until I like the flavor) and the liquid smoke.  It works. It's yummy and there you go.  I maybe even like the throw together a little more. It's almost the same amount of work but it's pretty dang good too!  Good Luck!!!!

Friday, July 3, 2015

Mom's Potato Salad

My mom always made the best potato salad. I have played with this salad and I think it tastes like hers. It really is quite plain with not a lot of stuff in it. My kids love it and one of my sons in law only eats this salad.  If we are at a party, before he takes a scoop of potato salad he turns to me and asks if it's mine.  If it is he takes some, but if not, he passes it by.

We were at a ward party and I had several people come up to me and ask me for the recipe.  The funny thing is that I never follow a recipe. My mother never followed a recipe.  So as I made this salad for our July 4th BBQ I thought I would put together a recipe.  IT WAS HARD!  That sounds weird but it was hard.  Anyway, I eyeballed the onion and then measured it out into another bowl.  Then I dumped the mayo into the first bowl and then measured it out into the bowl with onion.  Then I measured and tasted until I think I got it down on paper!  I make it a little on the salty side and then let it sit overnight or a few hours and the salty kind of absorbs and goes away.

I hope this works for you!  Good luck.
I used 12 medium sized potatoes and a dozen hard boiled eggs for this salad tomorrow. . My mom always did 1 to 1 ratio on potato and egg but if you like more egg in yours, add more eggs. (If you use less you will need to address the dressing.)   I boil my potatoes in their skins and then let them cool. I peel them and then cube them. I bring my eggs to a slow boil and once they start boiling I time them for 12 minutes.  I run cold water over them to cool them off.


I mixed up the dressing and poured it over the cubed potatoes and eggs. The onion that I put in is minced pretty small so there aren't big chunks. Mix well.

To me, potato salad is the quintessential 4th of July picnic dish.  I love it.  My family loves it! And evidently other people like this recipe as well.  Hope it works for you!!!


My Mom's Potato Salad

12 medium sized potatoes boiled in their skin in salted water
12 hard boiled large eggs

Dressing

1/4 cup finely minced onion
2 1/2 cups real mayo (I do not use light or miracle whip)
1  1/4  tsp. salt
3/4 tsp, black pepper
1/4 tsp onion salt
3 Tbls. dill pickle juice
2 Tbls. milk
1/2 tsp. prepared mustard

Mix all the dressing together.  It will taste salty but that is how you want it.  Mix with the potatoes and eggs.  Cover and let set in the refrigerator over night or several hours.

I sprinkle paprika over the top of it.

Good Luck!

Monday, June 15, 2015

Copy Cat Chili's Chicken Fajitas


I decided to serve a taco bar for my kids that came for Sunday dinner.  I looked up a copycat Chili's fajita recipe on Pinterest and thought I would try it. It actually turned out yummy so I thought I would share!

I had thought maybe I would just cook the chicken in a pan but then I thought how much better it would be on the grill.  Chicken doesn't take as long to marinate as beef so I marinated it for only about 4 hours.  It grilled up beautifully!


The extra marinade at the end of the recipe made a difference.  Make sure you use it.  Enjoy this recipe.  It's both easy and yummy!


Copy Cat Chili's Fajitas

      Ingredients: 
1/4 Cup Fresh Lime Juice
3 tbs. Olive Oil
1/2 tsp. Liquid Smoke
3 tsp. Soy Sauce
1 tsp. Salt
1/8 tsp. Pepper
4 Cloves Garlic, crushed
1/2 tsp. Cayenne Pepper (it does make it a little spicy, if you like more mild add 1/8 tsp)
Steaks (I used 1 Flat Iron Steak 2-3 lbs). You can use chicken if you want. 
1 Onion
1 Green Bell Pepper 
1 Red Bell Pepper
1 Orange Bell Pepper 
Marinade to make for later (in a separate bowl):
2 tbs. Water
1 tsp. Soy Sauce
1/2 tsp. Fresh Lime Juice
Dash of salt and pepper
How to Make: 
1. First you will want to make your marinade for the steaks! I grabbed a gallon ziploc bag and poured it into that. Add your 1/4 cup fresh lime juice, oil, garlic, soy sauce, liquid smoke, cayenne, pepper and salt. Then add your steak and seal the bag up. Mix it around a little bit. It needs to marinade at least 4 hours all the way up to 24 hours. The longer you marinade the stronger the flavors will be.
2. Next you want to add your marinade to make for later ingredients into a bowl to store in the fridge. You will use this once the fajita’s are cooked, you will pour this over the veggies and steak for a little more flavor. Combine the ingredients listed above for the extra marinade, water, soy sauce, lime juice, and salt and pepper.
3. Once your meat has marinaded long enough, turn out your grill, I used our Green Mountain Grill, and turned it to 400 degrees. It is okay to use a charcoal grill. You will toss your steaks on and cook like you would any steak. Once they are done pull them off, and let cool a few minutes and then cut into strips!
4. In a pan add a little oil to the pan and toss in your diced peppers and onion. Cook until they get a bit soft, it won’t take very long, 5 minutes or so. Once they are cooked, toss in your steak, and use that marinade you made and put in the bowl, and pour over the veggies and steak. Stir well, and serve!

5. I had sour cream, shredded cheese, and salsa on hand. Serve on warm tortilla’s, and enjoy!