Saturday, July 26, 2025

Palmiers and Rough Puff

 Okay! I'm lame.  I made this recipe the weekend of Father's Day back in June.  I have dragged my feet because I'm not sure I loved it.  I wanted to try my hand at rough puff pastry and so I dived in. The result were the Palmiers that I made.  My grandsons loved them. Me, I'm not so sure. But, I guess, I did it.

Honestly, they look picture perfect.  And they were pretty good. But I will begin with the rough puff pastry first because that's where these little goodies come from.

Rough puff pastry is a short cut recipe for puff pastry. To be frank, I have always wanted to try the delicious looking recipes that I've seen using puff pastry but I'm so stinkin cheap that I have never bought it. On the Great British Bake Off, they make rough puff all the time so how could I not try it.  The recipe I used came straight from the king himself, Paul Hollywood.
Rough puff is just a dough that you make with chunks of cold butter inside. The trick to getting the lamination of a puff pastry is the way you roll grated frozen butter into the dough. Before you start, grate the frozen butter and then put it back into the freezer while you bring the dough together.After mixing the dough together you roll it out into a rectangle on a lightly floured board. 
Once it's rolled to the size you want (I didn't measure but it's roughly 8 inches wide and 12 inches long) spread the bottom 2/3 with half the frozen butter. 


Fold the top third down and then fold the bottom up like folding a letter. Turn the dough 90 degrees with the folded side down and repeat the last process with the rest of the frozen dough. Wrap the dough in plastic wrap and put in the refrigerator for 30 minutes before using.  I actually left mine overnight and I would not recommend it.  It was way to hard to work with the next day. 

Now.  Onto the Palmiers. How cute are these little classic French pastry cookies.  To be quite honest, you could make these so easily without doing the rough puff. Just go to the freezer section of your favorite grocery store and buy and package of frozen puff pastry.

Roll out the rough puff into a large thin rectangle.  Sprinkle with sugar or with a cinnamon/sugar mix.  I did both to give each flavor a try. I'm a cinnamon girl! YUM! Fold the top third down and then the bottom third up. Next fold the top into the middle and the bottom into the middle.  It's fun how it forms a little heart.
Place them on a baking sheet lined with parchment (helps with the cleanup) Bake them in a hot oven- 400* for 6 minutes, flip them over and bake for another 3-5 minutes until they are golden brown. 

As they cool they get crispy/hard but they kind of fall apart as you eat them. Would I make them again? Probably! But I would loosen my purse strings and buy some frozen puff. Unless, of course, I can't stand it and have to try my hand at rough puff again.  Who knows???

Stay tuned. Because I have a really great Carrot Cake that I'm going to post. 


Rough Puff Pastry (Paul Hollywood)
300 g plain flour (all purpose)
pinch of salt
50 g butter, chilled and cut into cubes
120 g butter frozen and grated

Mix the flour and salt together in a bowl. Rub in the chilled butter using your fingers until the mixture is like bread crumbs.  Gradually add enough water to form a dough ( about 4-6 Tbls)

Roll the dough out into a rectangle on a lightly floured counter top.

Add half the grated frozen butter to the bottom 2/3 part of the dough (return the rest of the grated butter to the freezer). Fold down the top third to the center and then fold up the bottom third like folding a letter.

Turn the dough, seam side down and repeat, using the rest of the grated frozen butter.  Fold it the same.

Wrap the dough in plastic wrap and refrigerate for 30 minutes.  Ready to use.

You can make any recipe using puff pastry with this rough puff dough. Good luck.


Thursday, May 22, 2025

Genoise Sponge Cake - worth making

Have you ever heard of a Genoise Sponge Cake?  Well, I have wondered what it was like for a long time so, I decided that it should be my next bake.  The recipe calls for an 8 inch cake pan and I only had 9 inch so it only seems natural to get onto Amazon and order a new pan.  I bought the Fat Daddio's Anodized Aluminum pans because they come highly recommended.  Seems that they are great pans.
A Genoise Sponge Cake originated in Genoa, Italy.  It is a soft flavorful cake that you can fill with all kinds of wonderful things.  For this cake, I just used my homemade strawberry jam (I seem to be getting a lot of mileage out of that jam) and whipped cream.  I topped it with more cream and fresh strawberries.  It seemed a little dryer than I expected but it was tasty. Just means I'll have to make it again until I perfect it.

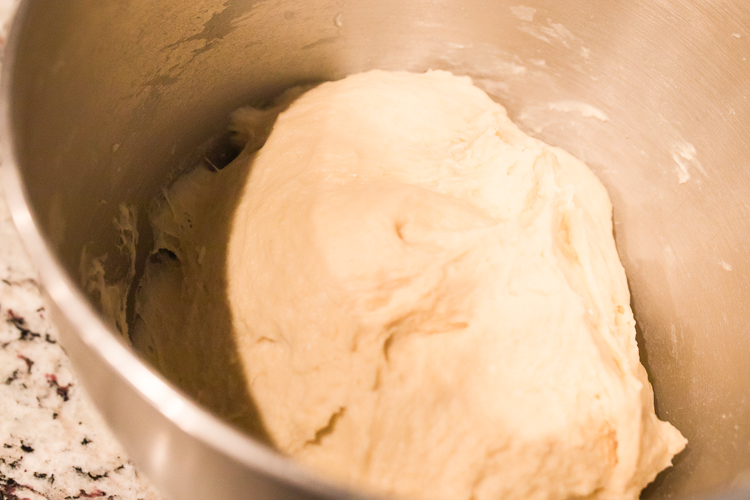
This cake uses just a few ingredients but following the directions is important.
**Very important -  your 4 eggs HAVE to be a room temperature

Preheat your oven to 350* and put rack in the center of the oven.

Prepare one 8 inch cake pan by cutting a piece of parchment to fit into the bottom. Spray the pan bottom and edges and then place the parchment in the bottom of the pan and spray it.

First, measure out your dry ingredients using a scale and then sift them together three times- this is important!

1 cup (120 grams) all purpose flour -sift with a fine mesh strainer
2 Tbls (16 grams) cornstarch - add to the sifted flour
1/4 tsp salt add to the flour and cornstarch and sift together three times. Set aside

Melt the butter and set aside to cool so that it is barely warm (you may want to do this while the eggs are beating)

In a mixer bowl add:
4 large eggs at room temperature 
2/3 cup (135 grams) granulated sugar
1 tsp pure vanilla extract (can also use Almond Extract)

Mix together with your mixer until eggs have increased in size and are thick and fluffy  **This is the trick for the sponge.  You have to beat the eggs and sugar on high for 10 minutes.
 
Now, gently fold in the sifted flour mixture.  (I actually sifted it once more into the eggs) Fold it in  with a spatula. Make sure you do not stir and deflate the eggs!


Next, fold in the melted butter just until incorporated being very careful to not
 deflate the cake mixture.

Pour into the prepared pan and put into the oven,  Bake for 25-30 minutes or until a toothpick comes out with a few moist crumbs.

Let cool for 10 minutes and then loosen the edges if needed with a thin sharp knife.  Turn out to finish cooling.

Once it is cooled, slice the cake in half through the middle and add whatever filling you might like. It can be a pastry cream or fruit - use your imagination.


Place the top on, dust with powdered sugar and enjoy!

**Note if you have a cake slicer like the pros use-that would be very helpful to get a clean even cut.  I guess I need to get back onto Amazon. 

I hope you will give a sponge cake a try.  It may seem a bit intimidating, but actually, it was easy and yummy.

Happy Baking!


Friday, May 2, 2025

Viennese Whirls

 Again!  What is it with the late post?  Well, maybe I got a little bit distracted?


We had the best time on the Big Island of Hawai'i but that shouldn't be an excuse.  My goal was to make something every month.  I finished these cookies at 9:45 thelast night of the month, April 30th-so I met my goal-I just didn't get it posted until now, May 2, 2025. So here we go!


Have you ever heard of a Viennese Whirl? It's a butter cookie made into a sandwich.  I was worried it would be a bit like the cookies I made for Valentine's Day but it's not. (I liked those better) These are an
easy cookie to make but not a great choice for someone who is right handed and has some arthritis happening in said right hand.  Squeezing these out of that little bag was hard and they really don't look great.  But, they do taste pretty tasty.
The dough is easy to mix together.  It's just butter and powdered sugar that you beat hard for 5 minutes.  It has some vanilla, all purpose flour, and cornstarch, and maybe a little tiny bit of milk.  That's it-no eggs.
The trick comes in making them look pretty with a star tip and piping bag.  

Draw 2 inch circles on the back of your parchment and then you know where to pipe.  My circles were a bit larger than 2 inches so I piped inside the circle and it seamed to work.  Refrigerate for 10 minutes and then bake at 355*.  Let them cook completely on the cookie sheet and then remove with a spatula.

Frost with the buttercream and add some jam. Top with the other cookie and there you go.  Sprinkle with a bit of powdered sugar is always a great addition.  But not before I took a bite.  They really are quite tasty.


Would I make these again? Probably!  Would I let Mike squeeze them into the circles? YES!  My poor hand was killing me by the time I finished. I hope you will give them a try.  And remember, weighing your ingredients helps to give you consistency.  Get a scale, it really is best to weigh instead of measure.

Viennese Whirls

250 g unsalted butter at room temp (I used salted butter)
3/4 c (105 g) powdered sugar
1 tsp (5 g) vanilla extract
1 1/2 c (225 g) all purpose flour
1/2 c (68 g) cornstarch
**Note here, my dough was so stiff that I added about 1 tbls milk to help and it worked great

Filling

125 g (1/2 c) unsalted butter (or salted)
1 1/2 c (210 g) powdered sugar
1/2 tsp (3 g) vanilla extract
1 Tbls milk - more if needed
raspberry/strawberry jam

Preheat oven to 355*
Line baking sheets with parchment paper that you have drawn two inch circle on the back
In an electric mixer mix the butter until well mixed and then add the powdered sugar and vanilla.  Beat hard for about 5 minutes, scraping the edges a couple times in that 5 minute period, or until it is light in color and light in texture.
Sift the flour and cornstarch into the butter and mix with mixer or by hand.  Add a little milk if it's too stiff-the dough should be soft but not loose
Put the dough into a piping bag that has been fitted with a large star tip.  Squeeze dough into the circles starting at the outside and coming into the middle.  Lift up and move to the next circle.
Put in the refrigerator while you do the next baking sheet.
Bake the first sheet for 10 minutes or until no raw dough is left and edges are just starting to brown.
Let cool on the pan.  
Remove and pair up the cookies with like sizes.  Spread or pipe the buttercream onto one cookie, add jam and top with the other cookie.  Dust with powdered sugar.
*Note, you can store cookies in the refrigerator for up to 5 days if they last that long!

Keep Baking!


Saturday, April 12, 2025

Banoffee Pie - My March bake posted late!

Mary Berry's BANOFFEE PIE

 I totally made this pie in the month of March and I have been dragging my feet to post.  Maybe because I didn't love the way it turned out! Actually, it was really delicious I just cooked the filling too long and it made it a bit difficult to eat.  There were several lessons learned and some day I will make it again and hope for the best.

I had my eye on this pie for a while.  Mary Berry is one of the first to be associated with the Great British Baking Show and is a master baker, so I decided I would use her recipe. Basically, it's a graham cracker crust with a toffee filling, topped with bananas and whipped cream.  The concept is brilliant-my execution, not so much. 

I started with a graham cracker crust in a tart pan so I could remove the outer rim.  


The filling is a mixture of brown sugar, butter and sweetened condensed milk.  What could be better than that? 


Top with a double layer of sliced bananas - I did my bananas last minute but if you have several hours before serving the pie, slice them into lemon juice so they don't turn brown.  Add plenty of sweetened whipped cream and chocolate shavings.  Serve and Enjoy!


Now for the lessons that I learned.
*First, the recipe doesn't call for enough butter in the graham cracker crust.  It fell apart all over the place so next time I try this pie, I will add more butter to hold the crust together.

You can see what a mess the crust was!

*Second, the recipe said to cook the filling, once it comes to a boil, for 5 minutes OR until it is a nice toffee color.  Well, after 5 minutes, my filling was pretty pale and not the color of what I think toffee is, so I continued to cook it. Don't do that! Next time, I will stick to the 5 minutes and we'll see if that works better.
It was tasty-but super chewy and hard to cute.  I just want a creamy, yummy, eat with a fork, kind of pie (Literally, after it sat in the fridge, you had to pick it up and bite it rather than using a fork)

So that's the story of this Banoffee Pie! Will I make it again? Yes, but with the tweaks to the crust and cook time.  If you try it, you'll like it.  Good luck!


BANOFFEE PIE

For the base
175g (6oz) digestive biscuits (graham crackers)
65g (2½oz) butter (add a bit more)

For the toffee filling
115g (4oz) butter
115g (4oz) light muscovado sugar (brown sugar)
2 x 397g cans full-fat condensed milk

For the topping
3 bananas, sliced
a little fresh lemon juice
300ml (½ pint) double cream
a little grated Belgian milk or dark chocolate, for sprinkling

You will need a 23cm (9in) deep loose-bottomed fluted flan tin.

To make the base, put the biscuits (graham crackers) into a polythene bag and crush them to crumbs with a rolling pin. Melt the butter in a small pan, remove from the heat and stir in the crushed biscuits. Mix well.

Spread the mixture over the base and sides of the flan tin. Press the mixture with the back of a metal spoon. Place in the refrigerator

To make the toffee filling, measure the butter and sugar into a large non-stick pan. Heat gently until the butter has melted and the sugar has dissolved. Add the condensed milk and bring to an easy boil, stirring continuously and evenly with a flat-ended wooden spoon for about 5 minutes, or until the mixture is thick and has turned a golden toffee colour – take care, as it burns easily. Turn it into the prepared crumb crust and leave to cool and set. (stick with the 5 minutes)

To make the topping, toss the bananas in lemon juice and arrange the slices over the toffee in a neat layer. Lightly whip the double cream until it forms soft peaks and spread evenly over the bananas. Sprinkle the whole pie with grated chocolate.

Remove the ring and transfer to a flat plate.

Serve well chilled.


Thursday, February 13, 2025

Biscuit Week Meets Valentine's Day

 On the Great British Baking Show, they always have a biscuit week.  The challenges are fun and I thought I should give one of the recipes a try.  A"biscuit" in Great Britain is a hard, thin, and crispy cookie that has a snap and is sometimes filled with something yummy. By definition, it's sweet, crumbly and sometimes buttery.  So this week/month, as my tribute to our friends across the pond, I made Paul Hollywood's Jammy Biscuits.  They are easy to make, BUT they take some time.  Delicious is an understatement. You'll have to give them a try and let me know what you think.


Because everyone, but us American's, use grams instead of cups, I am putting the recipe at the bottom of this post in both grams and measurements for those who don't want to figure out the conversions.  But, remember, it's better to weigh the ingredients than to measure them.  Just sayin!


Cream the butter and sugar together and beat for 3-5 minutes in your stand mixer.  Add the vanilla and eggs and beat until creamy. (*Note, I added half vanilla and half almond extract) Remove from the mixer and stir the flour and cornstarch in by hand.  It will be on the crumbly side but that's okay.  Pour it out onto a floured surface and gently work it with your hands to make a soft dough. Don't overwork it.


Divide the dough in half and then in half again so you have four equal sizes and form them each into a disc.  Wrap east disc in plastic wrap and place in your refrigerator to chill for 20 minutes.

After 20 minutes, remove one disc and roll it out to about the thickness of a nickel - because this was my first time making these, (and I WILL make them again) some may have been a little thicker and some a little thinner.  It's a learning process!


I cut them with a 3 inch fluted cookie cutter.  Paul says to use a 2 3/4 inch but I didn't have one that size.
Place on a cookie sheet that has been lined with parchment paper and put back into the refrigerator for another 20 minutes. You want half of your biscuits to be plain and the other half to have a cutout of your choice in it.  I chose hearts for Valentine's Day!
After 20 minutes in the refrigerator, place them in a 325* oven for 10-12 minutes.  Keep an eye on them so they don't get too brown but you want them to start to barely brown around the edges.  Mine actually baked for 14 minutes but it will be different for each oven, so watch them.

Let them cool on the pan for 5 minutes (I know, you will be setting your timer over and over and over).  Remove to a cooling rack and let cool the rest of the way.
Once they are cooled they are ready to assemble.
Before hand, dust the tops with a generous amount of powdered sugar.  You want them to really look beautiful!

Next, frost the bottoms of the plain biscuit with a little bit of the buttercream and then top that with your favorite jam. You can use raspberry, lemon curd, apricot preserves or strawberry jam.  I used strawberry.


After you spread the jam, carefully top with a powdered sugar biscuit with the cutout.  Look how cute these are.  I took them to the office where I volunteer today and the ladies went a little crazy.  There was not one soul who didn't rave about how yummy they are. 
Happy Valentine's Day and Happy Biscuit Week!  


Paul Hollywood's Jammy Biscuits
(this is a double batch because I needed more than 12 biscuits)

240 grams unsalted butter softened  -  1 cup
240 grams sugar  - 1 cup
2 eggs
1 tsp vanilla
430 grams all purpose flour - 3 1/2 cups
50 grams cornstarch - 1/2 cup

Buttercream

1/2 cup softened butter
1 1/2 cups powdered sugar
1 tsp vanilla

Mix the butter until fluffy, sift in the powdered sugar and add the vanilla.  Mix until thick and fluffy. I did add about 1 tsp of whipping cream to help bring it together.  It will be thick.

Mix the butter and sugar until fluffy - about 3-5 minutes in your stand mixer.  Add the eggs and the vanilla and mix until well blended.  Remove from the stand mixer and stir in the flour and cornstarch (mix these together with a whisk) until almost mixed- it will be crumbly.  Pour out onto a lightly floured surface and gently work with your hands into a soft dough.  Do not overwork.  Divide in half and then divide each half in half again. (*Note, if you are making half this recipe, only divide the dough in half)
Form each piece into a disc and wrap in plastic wrap.  Put in the refrigerator to chill for 20 minutes. 
After chilling your dough, remove one disc and roll out to about the thickness of a nickel.  Cut with a fluted cookie cutter and place each biscuit onto a cookie sheet lined with parchment paper. Rework the dough scraps and cut more until you have 12 bottoms.  Put back into the refrigerator to chill for another 20 minutes.  Remove another disc and repeat the process, except, with these you want to cut a shape into the center of the biscuit.  It can be any shape for any holiday that you want. Put the solid biscuit onto the cookie sheet and then cut the shape out.  Save the dough and use it to make a few extra biscuits. Put them in to chill.
Meanwhile, preheat your oven to 325*

Bake the first sheet of biscuits for 10-12 minutes watch them so they don't get overly baked.  You want the edges to just begin to brown.  Remove from the oven and let cool on the cookie sheet for 5 minutes.  Remove to a cooling rack and cool the rest of the way.

Dust the tops with a generous amount of powdered sugar.  Assemble the biscuits by spreading a dollop of the butter cream on the plain biscuit and then top with your choice of jam.  Add the top biscuit.  What a delightful treat.

Keep on Baking!


Thursday, February 6, 2025

Leslie's Parkerhouse Dinner Rolls (So Yummy)

Years ago, my friend Leslie shared her recipe for the most delicious rolls. These little pillows of deliciousness have been on my dinner table for over 35 years.  Whether it's Thanksgiving, Christmas Eve, Easter, or just a nice Sunday dinner, these rolls will be gobbled up in no time at all.
Just mix the dough in your big mixer with a dough hook.  The dough is soft and maybe just a bit sticky, but that is okay.  I just leave the dough in the same bowl that I mixed it in, cover it and let rise until double.


 After the dough has risen to double in size, pour out onto a floured work area and cut into thirds.  Roll each third into a large circle and cut (I use a pizza cutter) into 16 triangles. Starting at the wide end of the triangle, roll into a croissant shape roll.  Place on a large cookie sheet that has been sprayed with non stick spray. Cover with a clean dishtowel and let rise to double.
Bake at *350 for 15-18 minutes until a beautiful golden brown.  Remove from the oven and spread the tops with melted butter.
Get ready to be amazed


These rolls will quickly become your favorite.  You can make them any shape that you want.  You can also make cinnamon rolls out of this dough. Enjoy!

                                                                            Rolls ( Leslie’s Parkerhouse) 


3 cups milk  

1 cube butter 

1/2 cup sugar 

2 tsp salt 

1/2 cup warm water 

2 Tbls yeast 

2 eggs 

9 cups flour 


Mix milk and butter, warm in the microwave to melt the butter but don’t let it get too hot.  Dissolve yeast in warm water, let sit a couple of minutes to proof.  Measure half the flour, sugar, and salt into your mixer bowl. Add the milk mixture and mix with a dough hook.  Add the yeast and mix well.  Beat in the eggs and beat for 2-3 minutes to build the gluten.  Add the rest of the flour and mix until it pulls away from the edge and forms a ball.  Cover. Let raise until double. (I leave mine in the bowl I mixed it in and cover with a clean dishtowel)


Pour out onto a floured board. Cut into thirds and roll out in a large circle (about 12-15 inches around).  Cut into 16 triangles and roll from wide side to the point.  Raise until double in size.  Bake at 350* for 15-18 minutes. (I try not to overtake)  Brush with melted butter.

**makes 4 dozen rolls


Keep on Baking!