It's been years since I have posted on this blog. I guess I got busy, or maybe just needed something different in my life. I'm not really sure, but I'm back. I love to bake. And when I bake, I like to eat. So, I try not to bake too much and I fail miserably. When Mike and I returned from our mission, I started watching The Great British Bakeoff (thanks to a couple of my friends who love that show). As I watched, I started to have a desire to try my had at new, and maybe a little complicated, baked goods. And so, here I am, starting again! This blog will contain some fun recipes I've been eyeing. Some are easy! Some are hard! And some, I may have to try more than once. There are other recipes, besides baked goods, that I will post-favorites of ours that you might like to try. Stay with me! Bear with me! And here we go!
Have you ever heard of Clotted Cream? Who doesn't love that name? Well, it's a little bit of heaven on a scone. The Brits love it and I think people who have visited Great Britain love it. I've always wondered what it was so I did some searching on Pinterest and found that clotted cream is not hard to make, it just takes time - a lot of time. Basically, it's cream that has been cooked all night at a low temperature, then refrigerated for 12 hours, and then separated from the whey that is left behind. It's supposed to have a butter like consistency. Mine didn't turn out quite like that and I almost tried it again, but then, I decided it was good enough and went with it.

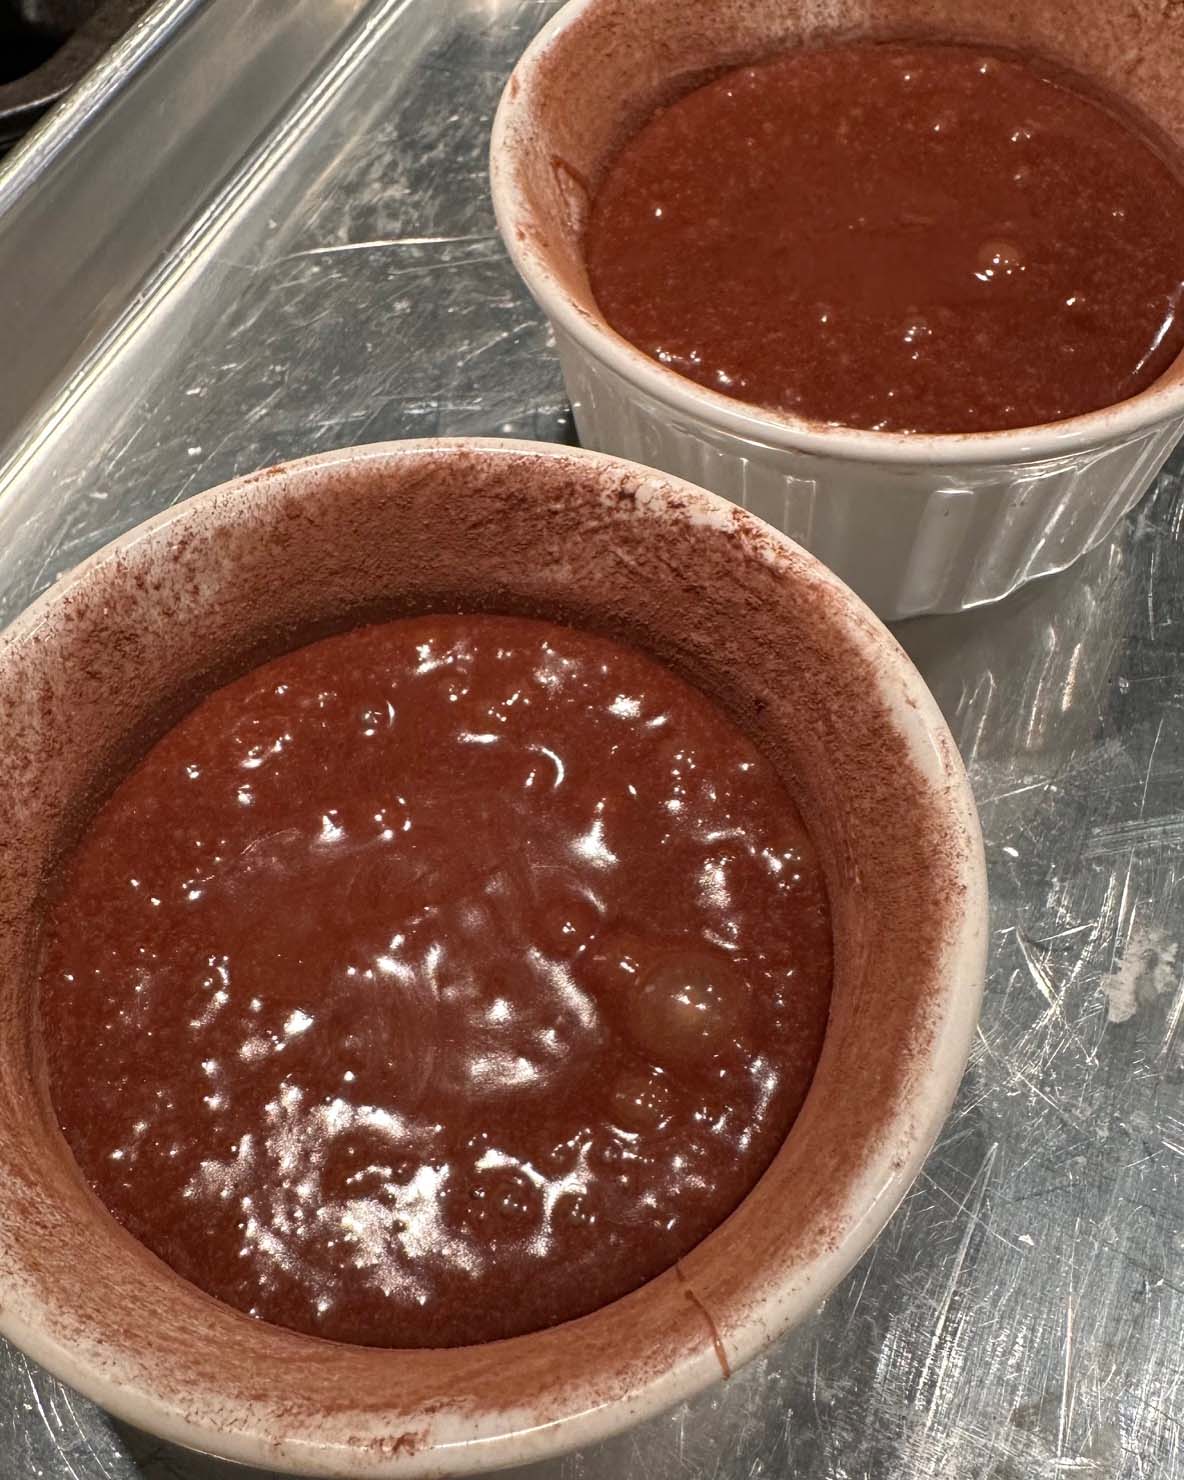
Start by preheating your oven to 180* and then measure out 2 cups of heavy whipping cream. Add to a glass pan that is large enough that the cream is 1 1/2 to 2 inches deep. The recipe I used said to cover with foil. When mine didn't work the way I thought it would, I looked at other recipes and they did not cover their cream. So you can decide what to do. Put the pan in the oven and let it stay for 12 hours. DO NOT open the door. Now this is tricky. Some ovens shut themselves off if left on too long. You do not want that to happen. Mine did. Mike checked it at 4:30 in the am (who is up at that hour???) and the oven was on, when I went out to pull it from the oven-the oven was off. It was still warm, and I still needed hot pads to remove it but maybe that's why it didn't work right. Your guess is as good as mine.
This is the way it is supposed to look. Once you remove it from the oven, let it sit to cool to room temperature. Then put it in the refrigerator for 12 hours.
At the end of 12 hours you can remove the clotted cream from the whey left at the bottom of the pan. Simply start lifting it from one corner to expose the liquid below and then tip the pan up and let the whey run into a bowl. Hold onto that whey because you can use it in other baking. In fact, I used a bit in the scones. YUM! And that's story about clotted cream. It is not sweetened but with strawberry jam, oh my.
Bring on the scones. When I started thinking about the recipes I wanted to try, I kept coming back to scones. They look a little like the baking powder biscuits that I make but they are not the same. Scones in America are much different than scones in Great Britain and I was anxious to try them. I looked at recipe after recipe but I wanted to follow Paul Hollywood's recipe. Do you know Paul Hollywood? Well, he is one of the judges on the show and he is quite the baker himself. I had a recipe but wanted to watch him in action. So, I went to YouTube and there he was in good form. He mixed the dough with his hands and
so that is what I did. Here are the steps. First, preheat your oven to 425*
First of all, weigh your ingredients instead of measuring them. The recipe below is measured in grams and milliliters.
Measure out the flour, using strong flour, or bread flour to us Americans. Add cold butter cut into cubes.
Begin mixing with your fingers. You want to break up the butter until it looks like breadcrumbs!

Keeping breaking up the butter. You don't want any big pieces.
Next, add the sugar and the baking powder. Mix with your hands to incorporate it.

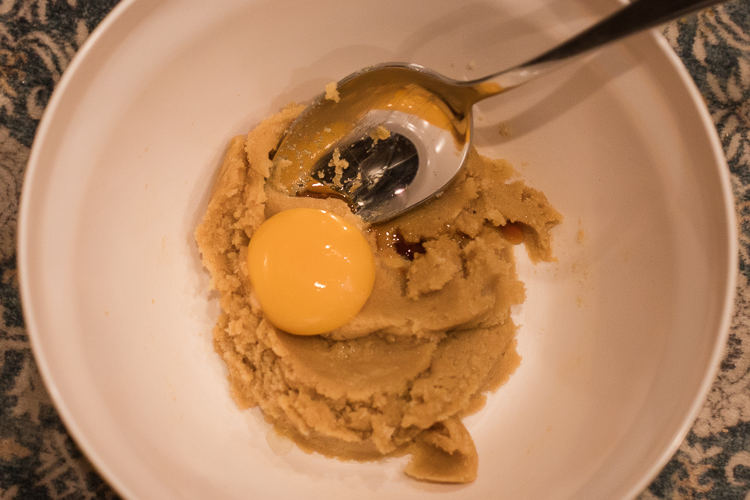
Crack the eggs into the flour and mix with your hands. It gets really messy but feels so good.
Add the milk and continue to mix with your hands. It will be sticky and that's how you want it.
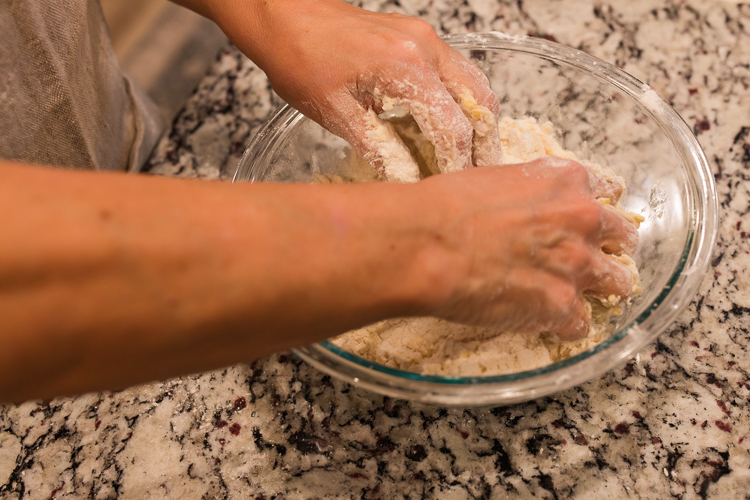
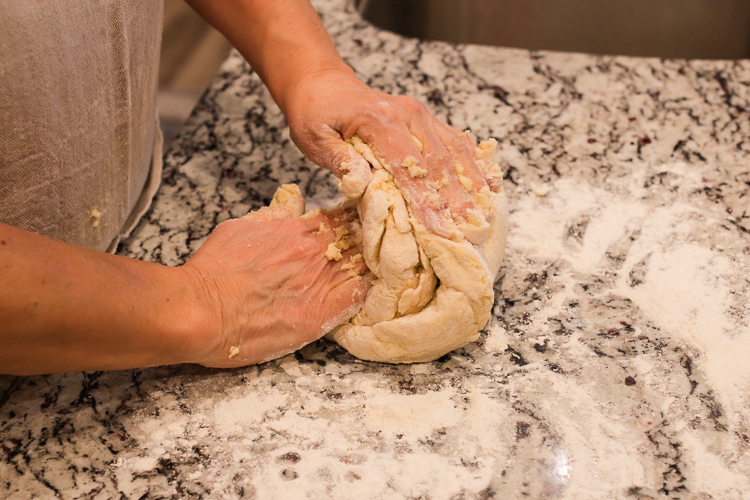
Dump it onto a floured board!
You don't want to knead the dough, but you do want to fold it over itself about 6-7 times.
Roll to about 1 or 1 1/2 inches thick.
Cut your scones. I don't have a round cutter so I used a glass. The round cutters are better if you have one.
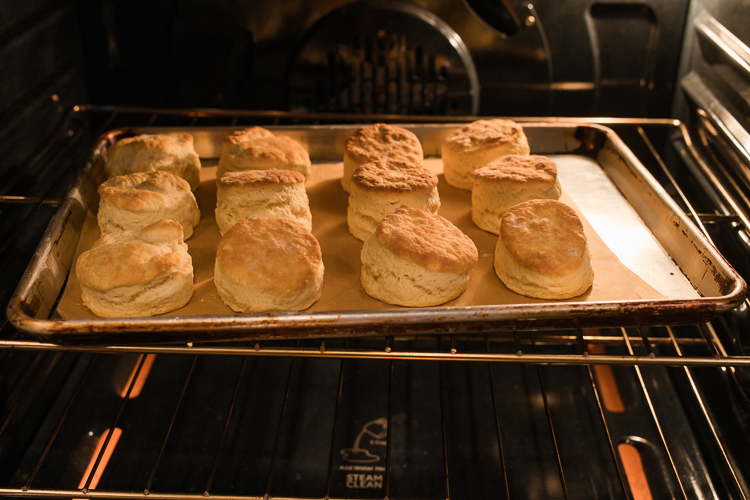
Lay the scones on parchment paper and put in the oven for 15 minutes.
15 minutes is about perfect. I pulled mine out about 30 seconds early.
Move them to a rack to cool. Look at the height of those babies.
Let the scones cool a bit. I was in such a hurry that my clotted cream ran down the sides. Maybe that is because it is on the runny side but it may have done better if the scone was cooled more. Can you believe how pretty that is?
And if you could just reach through the screen for a bite-oh my goodness- you would think you were in heaven. Such a fun and really easy recipe. Hopefully, when you feel adventurous, you will give it a try.
Until next time, Keep on baking!
2 cups heavy cream
Preheat oven to 180 *
Place 2 cups heavy cream into a glass pan. Place in oven and leave for 12 hours. Remove from the oven and let sit until cooled to room temperature. Cover with plastic wrap and carefully move to the refrigerator. Leave for 12 hours. Separate the clotted cream from the whey in the bottom of the pan. You can lift one corner back and then tip the pan and let the whey drain into a bowl. Save the whey for use in other recipes (can be used instead of milk) The brownish layer on top is normal and you just mix it into your clotted cream. It gives great flavor. The clotted cream should be the consistency of butter.
Store the clotted cream in a jar for up to a week.
Paul Hollywood's Scones
500 grams strong white flour or bread flour
80 grams unsalted butter - cold and cut into small squares
80 grams sugar
5 tsp baking powder
2 eggs
250 ml milk
For the egg wash
1 egg mixed well
Preheat oven to 425*
Put flour in a bowl and add the cold butter cubes. With clean hands, mix the butter into the flour breaking up the large pieces of butter until the flour and butter resembles bread crumbs. Add in the sugar and the baking powder and mix with your hand until incorporated. Add the eggs right into the bowl and mix with your hands and then add the milk mixing until all the flour is mixed in. Dump out onto a floured board and fold the dough over itself about 6-7 times. Do not work too much or the scone will be dense. Clean off your hands as best as you can before you fold the dough. Pat into a circle. Wash your hands and then roll into a circle about 1- 1 1/2 inches thick. Cut into scones and place on parchment paper. Bake for 15 minutes. (should be perfect timing)
Remove from oven and move to a cooling rack. Cool. Eat while still warm. Serve with clotted cream and strawberry jam. Delish