Thursday, August 26, 2010

A Chocolaty Chocolate Chip Cookie

Natalie wanted to create this blog so she and we could try new recipes and learn new ways. Natalie wanted me to continue with this blog because it will help fill my time and help me to think of her. So I begin again and hope you will all enjoy and cook along with me.


These chocolate chip cookies are really good. My niece, Diana, turned me onto a new food blog called Our Best Bites. These are from Cook's Country from Cook's Illustrated. They are crispy on the outside and soft on the inside and filled to overflowing with chocolate chips. YUMMO!


The Cast of Characters


Measure out the dry ingredients into a bowl.


Uses Real Butter-makes it always taste so good!


The butter is melted first and then you add the sugars and vanilla. Mix all together.


This uses 1 large egg and 1 egg yolk.


The dough (if it makes it to the pan).


Make the dough balls any size you want. These are about like a ping pong ball.


All baked. Let them cool on the pan.


The stack of cookies and a bite taken out of one. WOW! These really are yummy and chocolaty.


CHEWY CHOCOLATE CHIP COOKIES from Cook's Illustrated

2 C plus 2 T flour
1/2 t baking soda
1/2 t salt
12 T butter (1 1/2 sticks) melted and cooled until warm
1 cup brown sugar (light or dark)
1/2 C granulated sugar
1 large egg + 1 egg yolk
2 t vanilla extract
1 1/2 C semi-sweet or bittersweet chocolate chips

Heat oven to 325 degrees. Adjust oven racks to upper- and lower- middle positions. Mix flour, salt, and baking soda together in medium bowl; set aside.

Either by hand or with electric mixer, mix butter and sugars until thoroughly blended. Mix in egg, yolk, and vanilla. Add dry ingredients; mix until just combined. Stir in chips.

Now, I'll share a method from Cook's Illustrated, and then the method I used. CI says the following

Bake until cookies are light golden brown and outer edges start to harden yet centers are still soft and puffy, 10-13 minutes. Cool cookies on cookie sheets. Serve or store in airtight container.

Tuesday, August 10, 2010

Creme Brulee


The first time I ever had Creme Brulee was a few years ago at the Roof at the Joseph Smith Memorial Building. I fell in love with it then. On our cruise to Italy last year, I ordered Creme Brulee every chance I got. I have wanted to try making Creme Brulee for a very long time. My kids gave me a set of ramekins and a torch for my birthday in March and I just now made this little bit of heaven. The recipe, if I had been paying attention, made way too much for the ramekins that I had so needless to say I dumped some in a couple of other oven friendly bowls and baked up the rest of it. If you try this recipe, cut it in half. Hope you will try it out.

Start with 10 egg yolks.


Put cream into a sauce pan and simmer until hot but do not boil.


Beat the eggs until golden and add the sugar. Mix well.


Add 1 cup of hot cream into the eggs a little at a time to temper the eggs. This heats up the eggs and gets them used to the heat without cooking the eggs. Then add the rest of the cream while mixing. It will be light and frothy.


Pour the mixture into the ramekins that are on a baking sheet. Put the baking sheet into the oven and add water to the pan so that it comes up the sides of the ramekins.


Bake for 30 minutes. The center will still be a little wiggly. Do not overbake. You might need to watch them right at the end so they don't brown. Cool on the counter and then put into the fridge for 2-3 hours to chill.


When you are ready to eat, take out the ramekins, sprinkly with fine baking sugar (or regular if that is what you have) and then use a Creme Brulee torch to caramelize the top. (I think you could use your pre-heated broiler if you don't have a torch) EAT immediately.


The little ramekin! YUMMY!


Even better the next day. Of course, this ramekin is bigger than the others. Love this recipe. I will be making this again but I will make sure to half the recipe. I hope you enjoy.

Stay tuned to the other recipe I made the same night but was a real FLOP!


Crème Brûlée

Prep Time: 20 Minutes | Cook Time: 30 Minutes | Difficulty: Intermediate | Servings: 6


Ingredients
■4 cups Heavy Cream
■1 whole Vanilla Bean OR 1 Tablespoon Vanilla Extract OR 1 Tablespoon Vanilla Paste
■10 whole Egg Yolks
■¾ cups Sugar
■6 Tablespoons Superfine (Baker's) Sugar
Preparation Instructions
Preheat oven to 325 degrees.

Pour the cream into the saucepan. Add vanilla (whichever product you’re using) and simmer over medium-low heat.

Whip egg yolks with the sugar until pale yellow and thick.

Strain cream using a fine mesh strainer.

Whip yolks while you very slowly drizzle in 1 cup of warm cream. Go slowly so as not to cook the eggs! Once the first cup is added, you can add the rest of the cream slowly.

Place ramekins onto a rimmed baking sheet. Pour custard mixture into ramekins. Pour water in bottom of baking sheet until it comes halfway up the ramekins. Bake for 30 minutes, or until just set. Do not allow to get brown.

Cool ramekins on countertop, then chill for at least 2-3 hours, covered in plastic wrap.

To serve, sprinkle 1 tablespoon over each ramekin of custard. Use a kitchen torch to quickly (but carefully) brown the sugar. There should be a thin, crisp surface of burned sugar on the top.

Serve immediately

Friday, July 30, 2010

Not This Week

Sorry to say that there has been no cooking in our house this week. I have been dealing with a week long battle with strep throat and still I am not on top of it. I've had two different antibiotics but my throat is still sore and all I want to do is sleep. Needless to say, the thought of eating let alone fixing food right now turns my stomach! Hopefully, I will be up and moving soon. It's been way too long!

Much Love:)

Wednesday, July 21, 2010

16 minute (give or take a minute) Beef and Bean Burritos


I wanted to try something that would fit into an easy main dish. I found this very easy recipe on The Pioneer Woman. I've decided I really LOVE her! This fit the bill for easy and I just used the microwave and didn't heat up this house on such a hot day. I hope you will enjoy this recipe. It has a little kick but that's okay sometimes you just have to kick life in the butt! (OOPS! sorry)


I used 85% lean ground beef. I was faithful about using 93% lean ground beef until I found The Pioneer Woman. Like she says, "a little fat makes the beef taste much better". You know what? She is right. 93% is tough and weird tasting. Actually, this burger didn't have much fat at all.

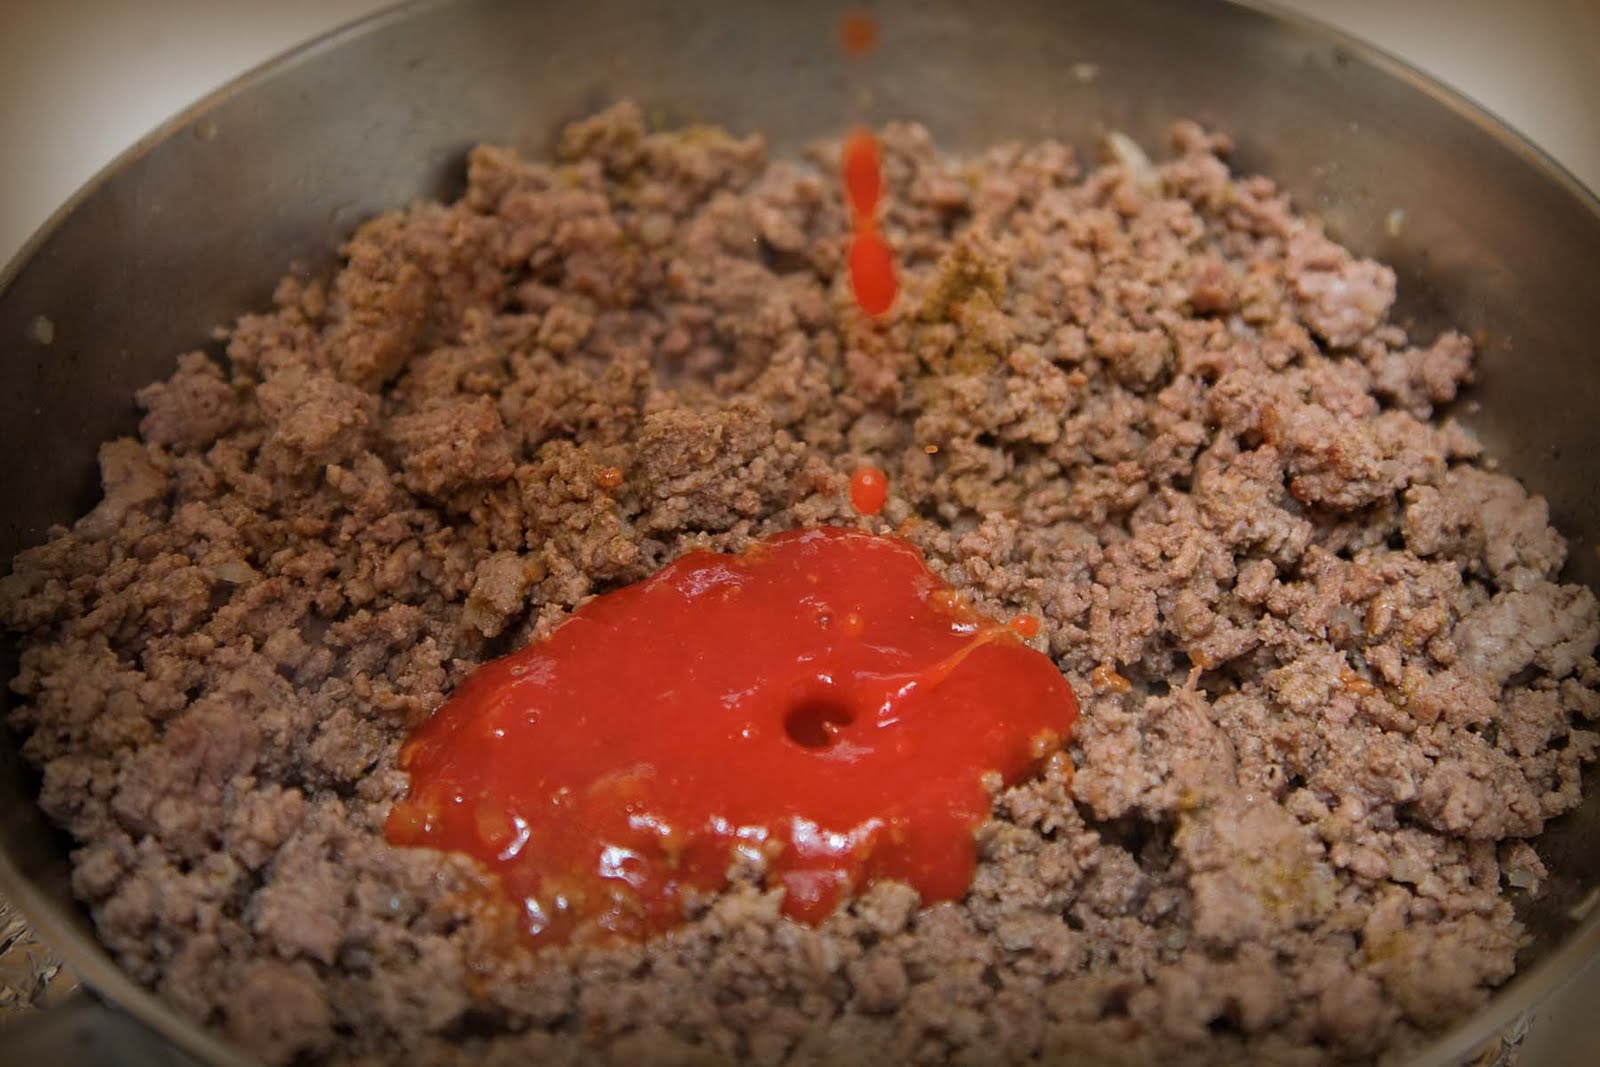
I have been using El Pato sauce for the last 35 years to make my enchilada sauce so I was excited to try it in this recipe. This is where the bite comes from. You can buy this in your grocery store on the Mexican (can I say that?) food aisle. I will include my enchilada sauce recipe at the end of this post.

Add the El Pato sauce to the meat.


Layer everything on the tortilla


Of course, I added more cheese. (Add cheese to your refried beans. I thought I took some pics of that but I don't know where they went!)


Fold them all neat and top with sauce if you want.


We topped out burritos with a little enchilada sauce, more cheese, sour cream and lettuce. We liked this recipe. I would make it again because it is so fast and yummy. Natalie would prefer my chicken enchiladas which are just chicken and cheese rolled in a tortilla and topped with my enchilada sauce, sour cream and lettuce.

Try these out. I think you will like them. Have fun!

Sixteen Minute Beef and Bean Burritos

Ingredients
2 pounds Ground Beef
½ whole Medium Onion
1 can (7 Ounce) Mexican Tomato Sauce Or Enchilada Sauce
Salt And Pepper, to taste
Cumin, Oregano, Chili Powder, Garlic To Taste
1 can (28 Ounce) Refried Beans
¾ cups Grated Cheddar Cheese
12 whole Burrito-sized Flour Tortillas
Extra Grated Cheese, For Sprinkling
Extra Sauce, For Drizzling
Cilantro Leaves, Optional
Optional Filling Ingredients: Mexican Rice, Sour Cream, Guacamole, Green Chilies, Pico De Gallo
Preparation Instructions
Brown ground beef with onion and season to taste. Pour in sauce and simmer over low heat. Add water if mixture gets too dry.
Heat refried beans in a saucepan. Add cheese and stir in till melted. Keep warm.
Heat tortillas in microwave for one minute.
Spread a small amount of beans on each tortilla. Add meat. Fold over ends, then roll up. Place two burritos on a microwave-safe plate. Drizzle red sauce over the top and sprinkle with more grated cheddar. Microwave for one minute, or until cheese is melted and burritos are very hot. Serve immediately.
OPTIONAL: Fill burritos with any optional ingredients you like. (I love them full, but my boys like them very plain.)


Marjean's Enchilada Sauce

1 can El Pato sauce
1 can 8 oz. tomato sauce
2 cans Cream of Chicken or Mushroom soup

Mix all together and pour over your favorite enchiladas. Has a kick so you can use sour cream to neutralize the heat.

Thursday, July 15, 2010

Frozen Hot Chocolate from Serendipity in New York


My niece sent me this recipe from the Serendipity cookbook that her parents brought her from New York. We wanted to try it immediately. Needless to say this recipe is pretty easy and absolutely delish! I think we have found our new summer treat. Hope you have fun with it!


A little bit of Heaven.


Frozen Hot Chocolate

6 half ounce pieces of a variety of your favorite chocolates
2 teaspoons storebought hot chocolate mix
1 1/2 tablespoons sugar
1 1/2 cups milk
3 cups ice
whipped cream
chocolate shavings

*Chop the chocolate into small pieces and place it in the top of a double broiler over simmering water, stirring occasionally until melted. Add the hot chocolate mix and sugar, stirring constantly until thoroughly blended. Remove from heat and slowly add 1/2 cup of the milk and stir until smooth. Cool to room temperature.

*In a blender place the remaining cup of milk, the room temperature chocolate mixture, and the ice. Blend on high speed until smooth and the consistency of a frozen daiquiri. Pour into a giant goblet and top with whipped cream and chocolate shavings. Enjoy with a spoon or a straw--or both!

Counterfeit Samoas-YUM!


We decided we wanted a yummy cookie to go with out frozen hot chocolate. We love Girlscout Samoas and came across this recipe. Needless to say, we jumped all over it. These little wonders turned out wonderful. I made them too big so I would definately make them smaller next time.

Real Butter. HEAVEN!


Mix it all together.

YUM!

Roll out between wax paper and cut with a cookie cutter or if you don't have one use whatever you can find around the house. The recipe says to use a 1 1/2 inch cookie cutter and I would advise it.


Use something smaller to cut a hole in the middle.


Bake until edges begin to brown.


Toast the coconut. Watch it so it doesn't burn.

Melt the caramels


Add the toasted coconut.


The final picture. These turned out yummy. We would make them again We would just make them smaller. Hope you try these out.


Cookies ~ Homemade Samoas
(also known as Caramel de-Lites)
Makes about 3 1/2 to 4 dozen

1 cup butter, softened
1/2 cup sugar
2 cups all purpose flour
1/4 teaspoon baking powder
1/2 teaspoon salt
1/2 teaspoon vanilla extract
up to 2 tablespoons milk

Preheat oven to 350F.
Cream together butter and sugar in a large bowl. Mix in flour, baking powder and salt at a low speed, next, the vanilla and milk, adding in the milk only as needed to make the dough come together without being sticky (you may not need any at all). The dough should come together into a soft, pliable ball. Add in a bit of extra flour if your dough seems sticky.

It's easiest to roll the dough out in 2 or 3 batches (between pieces of wax (or parchment) paper to about 1/4-inch thickness (or a little thinner) using a 1 1/2-inch cookie cutter to make rounds. Place on a parchment lined (or on silicone mat) baking sheet and make a hole in the center. I used the small end of a large round piping tip. Nicole comments that you can use a knife, or the end of a wide straw, to cut a smaller center hole. Repeat until the dough is used up (it's okay to re-roll, this dough is shortbread-like and very forgiving.)

Bake cookies for 10-12 minutes, until bottoms are very lightly golden brown around the edges.

Cool for a few minutes on the baking sheet, to allow them to firm up slightly, then transfer to a wire rack to cool completely.

Topping:
3 cups shredded coconut (sweetened or unsweetened)
12-ounces good-quality chewy caramels
1/4 teaspoon salt
3 tablespoons milk
8 ounces dark or semisweet chocolate (chocolate chips will do)
If you prefer milk chocolate, by all means use that.

My notes: The caramel-coconut mixture is quite sweet, so I used Bittersweet chocolate to balance the sweetness bit.

Preheat oven to 300 degrees (F)


Spread coconut evenly on a rimmed baking sheet and toast 20 minutes, stirring every 5 minutes, until coconut is golden. Watch carefully, especially near the end of toasting time; the coconut toasts very quickly once it begins to become golden.
Cool on baking sheet, stirring occasionally. Set aside.

Unwrap the caramels and place in a large microwave-safe bowl with milk and salt. Cook on high for 3-4 minutes, stopping to stir a few times to help the caramel melt. When smooth, fold in toasted coconut with a spatula.
Using the spatula or a small offset spatula, spread topping on cooled cookies, using about 2-3 teaspoons per cookie. Reheat caramel for a few seconds in the microwave if it begins to firm up, to make it soft and spreadable once again.

While topping sets up, melt chocolate in a small bowl. Heat on high in the microwave in 45 second intervals, stirring thoroughly to prevent scorching. (I melted mine stovetop using double boiler method.) Dip the base of each cookie into the chocolate and place on a clean piece of parchment paper (I used silicone baking mats instead). Transfer all remaining chocolate into a piping bag or a ziplock bag with the corner snipped off and drizzle finished cookies with chocolate. (Melt a bit of additional chocolate, if there is not quite enough for each cookie.)

Let chocolate set completely before storing in an airtight container.