Wednesday, June 30, 2010

Happy 4th of July

We saw this really fun cake on Studio 5, a local fun talk show. We knew the minute we saw it that we wanted to make it. Ours didn't turn out as good as the one on the show. We didn't take the time to freeze the cake and that would make a really big difference so we would suggest you do that. We also didn't prepare to have really cute decorations and sprinkles. It turned out fun anyway. Next time we would make our layers thicker. We were probably supposed to do that but we used divided on cake in half and used the second half of the batter from the other cake mix to make cupcakes. The batter should have been split between the three pans. We used canned icing and I would definately make my homemade frosting next time. Hopefully you can make yours look adorable to help celebrate the 4th of July with a bang!


RED WHITE and BLUE FLAG CAKE
Baking Directions:
To make this cake you will need three full layers of white cake, all the same height (make two recipes of cake or two cake mixes - you will end up with four layers so use one for another purpose). One layer will need to be white, one layer will need to be red and one layer will need to be blue. Use food coloring to get desired shade. Bake the layers in 9" round greased and floured rounds. Let cool. Freeze the layers to make them easier to work with during assembly.
Assembly:
Split the white layer and the red layer in half horizontally using a long serrated knife. (You can also use a cake leveler to help keep the cut even.) Do not split the blue layer. Start assembly by placing one split white layer on a cake plate. Frost the top of this layer using white icing. Place one of the red split layers on top of the frosted white layer and frost it with icing. Set aside.
Place the remaining red split layer and the remaining white split layer on top of the full blue layer. Place a round bowl (or paper pattern) approximately 5" diameter on the top of the cakes in the center and cut through all the layers using the bowl as a guide. You should now have a circle cut through the layers. Keep the center red circle, the center white circle and the outer (approximately 2" wide) blue cake ring. Set aside all other cake pieces for a different use.
Place the outer blue cake ring piece on the iced white and red cake layers. Carefully spread icing around the inside of the blue ring. Insert the round white cake piece in the center of the blue ring and ice. Insert the red round cake piece making sure it is flush with the blue cake ring. You should now have a complete cake ready to ice. Finish by icing the entire cake with white icing and decorating as desired.
To serve, cut into slices and be amazed at the cool flag each piece becomes!
Tips:
• I used paste food coloring to get the deep shades needed - however you can use liquid or a combination of both. It will take quite a bit of color. If you do not have the right tone of blue, mix a little black food coloring with a lighter blue color to achieve the right shade of blue.
• You can use 8" round pans to bake in - but I liked the proportion of the final flag pieces with the 9" pans. You will need to adjust cutting measurements accordingly if using different sized pans.
• I cannot emphasize enough how much easier it is to assemble this cake if the layers are frozen when working with them. They thaw quickly so can be assembled right before serving if desired.
• Use regular, whipped cream or cream cheese icing.
• Decorate the cake with patriotic sprinkles, tiny flags, red, white and blue candy, berries, etc.
Thursday, June 24, 2010

Bacon Cheeseburger Bundles

The Bacon Cheeseburger Bundles recipe was a last minute choice so we would have something other than sweets to blog about. They were a hit. We substituted pop-n-fresh biscuits instead of homemade dough and we used shredded cheddar instead of the Velveeta. We liked them but would definately like them better with homemade bread dough. We would make them again for sure. They reminded us of a baked empanada. Maybe next time we could add a little green pepper to the burger.


Some of the ingredients. This shows the Crescent rolls but when I opened them they were all stuck together and couldn't be used (they spent a little too much time in my fridge). I opted to use Pillsbuty Grands Biscuits instead. They worked.


Cooking the bacon. Can you think of anything that doesn't taste better with bacon?


Ground beef and onions!


Bacon in with the beef!


Using the Grands biscuits worked well. We rolled them out individ- ually, filled them, folded them and baked them.


The bundles baked in about 13 minutes with the Grands. They came out of the oven golden and shiny so we didn't brush them with butter.


The present- ation. YUM!

Wednesday, June 23, 2010

Bacon CheeseBurger Bundles

We have struggled finding a recipe that we were desperate to try this week. Unfortunately we didn't find anything that grabbed us, other than desserts, until tonight. We are going to try making Bacon Cheese Burger Bundles (recipe below). We are going to cheat a bit on this though. You know I love to make bread,but I need this to be a bit less time consuming this time around. We are going to use pop and fresh crescent rolls (what ever brand you like) and we will use shredded cheddar instead of Velveeta. Hope you try these little yummy sounding bundles. Put them with a salad and they will make a nice meal. Good Luck!


Bacon Cheese Burger Bundles
Ingredients
BREAD
• 2 packages (1/4 ounce each) active dry yeast
• 2/3 cup warm water (110° to 115°)
• 2/3 cup warm milk (110° to 115°)
• 1/4 cup sugar
• 1/4 cup shortening
• 2 eggs
• 2 teaspoons salt
• 4-1/2 to 5 cups all-purpose flour

FILLING:
• 1 pound sliced bacon, diced
• 2 pounds ground beef
• 1 small onion, chopped
• 1-1/2 teaspoons salt
• 1/2 teaspoon pepper
• 1 pound VELVEETA Pasteurized Prepared Cheese Product, cubed
• 3 to 4 tablespoons butter, melted
• Ketchup or barbecue sauce, optional
Directions
• In a large bowl, dissolve yeast in warm water. Add the milk, sugar, shortening, eggs, salt and 3-1/2 cups flour; beat until smooth. Stir in enough remaining flour to form a soft dough.
• Turn onto a floured surface; knead until smooth and elastic, about 6-8 minutes. Place in a greased bowl, turning once to grease top. Cover and let rise in a warm place until doubled, about 1 hour.
• Meanwhile, in a large skillet, cook bacon over medium heat until crisp. Using a slotted spoon, remove to paper towels. In a Dutch oven, cook the beef, onion, salt and pepper over medium heat until meat is no longer pink; drain. Add bacon and cheese; cook and stir until cheese is melted. Remove from the heat.
• Punch dough down. Turn onto a lightly floured surface; divide into fourths. Roll each portion into an 12-in. x 8-in. rectangle; cut each into six squares. Place 1/4 cup meat mixture in the center of each square. Bring corners together in the center and pinch to seal.
• Place 2 in. apart on greased baking sheets. Bake at 400° for 9-11 minutes or until lightly browned. Brush with butter. Serve warm with ketchup if desired. Yield: 2 dozen.

Friday, June 18, 2010

Icebox Key Lime Pie

Our Icebox Key Lime turned out like we thought it would. We weren't too worried because Cook's Country and America's Test Kitchen try and test their recipes 100 times. It was a pretty easy recipe to follow and the end product was yummy.


The recipe called for 6-8 limes or 40 key limes. We used more than 8 to get our 1 cup of juice. We don't know that we would want to squeeze that many again so we were wondering about using the lemonade pie recipe and substitute limeade instead. It might work. We were a little worried about the pie being bitter because of the lime zest (when we tasted the filling it tasted a little bitter) but as it sat overnight in the crust and with some whipped cream, it tasted much better.


We don't use my food processer very much but this recipe was a breeze at the touch of the finger!


In the end our Icebox Key Lime Pie was a hit. We liked the lime flavor and the texture. We most likely will make it again sometime but for now, on to our next recipe!

Sunday, June 13, 2010

Yummy Pie

This week we decided to try a dessert. We love watching America's Test Kitchen and Cook's Country on PBS (Since we don't have cable or dish with all those cooking shows). This is a recipe from Cook's Country called Icebox Key Lime Pie. The recipe is actually quite easy. They say to use regular limes-that the pie is just as good and lot less expensive. Have fun with this recipe. We are salivating already.

Icebox Key Lime Pie

Ingredients
CRUST
8 whole graham crackers , broken into smaller pieces
2 tablespoons sugar
5 tablespoons unsalted butter , melted
FILLING
1/4 cup sugar
1 tablespoon grated lime zest
8 ounces cream cheese , softened
1 (14-ounce) can sweetened condensed milk
1/3 cup Instant Vanilla Pudding Mix
1 1/4 teaspoons unflavored gelatin
1 cup fresh lime juice from 6 to 8 limes
1 teaspoon vanilla extract
Instructions
1. For the crust: Adjust oven rack to middle position and heat oven to 350 degrees. Pulse crackers and sugar in food processor until finely ground. Add melted butter in steady stream while pulsing until crumbs resemble damp sand. Using bottom of dry measuring cup, press crumbs firmly into bottom and sides of 9-inch pie plate. Bake until fragrant and browned around edges, 12 to 14 minutes. Cool completely.
2. For the filling: Process sugar and zest in food processor until sugar turns bright green, about 30 seconds. Add cream cheese and process until combined, about 30 seconds. Add condensed milk and pudding mix and process until smooth, about 30 seconds. Scrape down sides of bowl. Stir gelatin and 2 tablespoons lime juice in small bowl. Heat in microwave for 15 seconds; stir until dissolved. With machine running, pour gelatin mixture, remaining lime juice, and vanilla through feed tube and mix until thoroughly combined, about 30 seconds.
3. Pour filling into cooled crust, cover with plastic, and refrigerate at least 3 hours or up to 2 days. To serve, let pie sit at room temperature for 10 minutes before slicing.

Thursday, June 10, 2010

We liked the Crash Hot Potatoes. We made some changes that are listed below. Natalie liked using some ranch dressing as a dip. Even though we used little reds, some of them were a little big. Next time we would try to use potatoes about the size of a golf ball. We think this recipe is a winner.


I was out of olive oil so we used melted butter instead. It was yummy but I want to try them again with olive oil and thyme.


We wanted to top some of our potatoes with green onion, bacon bits and cheese. Bacon and cheese always makes everything taste better!


This is the final shot. We served these yummy little potatoes with Poor Man's Steak smothered in mushroom gravy. It made for a really nice meal with a side salad to balance it out. We loved this recipe but thought that maybe next time we would try them with little baby russets (Natalie thought the reds were just a little sweet for her taste). Hope you get to try them out!

Sunday, June 6, 2010

Crash Hot Potatoes

Ok everybody, the recipe we are trying this week is Crash Hot Potatoes. We found this on the Pioneer Woman website. They look amazing! If you want to see pictures before we post go to her website they will make your mouth water. Here is the recipe hope you join us as we savor every bite! We cook the recipe Thursday nights and will post Thursday night or Friday.

Crash Hot Potatoes

12 whole New Potatoes (or Other Small Round Potatoes)
3 Tablespoons Olive Oil
Kosher Salt To Taste
Black Pepper To Taste
Rosemary (or Other Herbs Of Choice) To Taste


Bring a pot of salted water to a boil. Add in as many potatoes as you wish to make and cook them until they are fork-tender.
On a sheet pan, generously drizzle olive oil. Place tender potatoes on the cookie sheet leaving plenty of room between each potato.
With a potato masher, gently press down each potato until it slightly mashes, rotate the potato masher 90 degrees and mash again. Brush the tops of each crushed potato generously with more olive oil.
Sprinkle potatoes with kosher salt, fresh ground black pepper and fresh chopped rosemary (or chives or thyme or whatever herb you have available.)

Bake in a 450 degree oven for 20-25 minutes until golden brown.

Eat Your Heart Out Chili's

Chili's Cajun Chicken Pasta - The Ingredients...
What You'll Need to Make Chili's Cajun Pasta:


• 4 boneless, skinless chicken breast halves
• 4 tsp. cajun seasoning
• 4 tbsp. butter or margarine
• 3 cups heavy cream
• 1/2 tsp. lemon pepper seasoning
• 1 tsp. salt
• 1 tsp. black pepper
• 1/4 tsp garlic powder
• 8 oz. cooked penne pasta (drained)
• 2 roma tomatoes, diced
• fresh shredded parmesan, to taste
Chili's Cajun Chicken Pasta - The Process...
How to Make Chilis Cajun Chicken Pasta:

1. Slightly moisten chicken with water.
2. In a large resealable plastic bag, shake chicken and cajun seasoning until chicken is thoroughly coated.
3. In large skillet, sautee chicken in 2 tbsp. butter, over medium heat, turning whenever neccessary.
4. When chicken is about half-way done, grab a second skillet and combine heavy cream, 2 tbsp. butter, and remainder of seasonings over medium heat, stirring occasionally.
5. When cream mixture begins to bubble, add the pasta and turn off heat. Stir well.
6. When chicken is cooked through, place on cutting board and slice into strips.
7. Spoon pasta and sauce onto large serving plates (2) and top with chicken, diced tomatoes, and parmesan
8. Throw a thick, garlicy slice of Texas toast on that bad boy and enjoy


The cream sauce looked a little scary when we first started out but as it cooked, it came together and was smooth and creamy. Just remember to stir as you cook.


We kind of wished that the sauce was not so thin. We thought that next time we would try using less cream and see if it would thicken up just a bit. Overall, the recipe was yummy. We topped it off with chocolate lava cakes but I didn't photograph that recipe so I will just have to make it again and let you try it.

A Luau

After spending time in Hawaii, we wanted to have a luau to share some of the amazing food with our family. We tried the Kalua pork (not made with booze at the PCC) that I had found the recipe for on the PCC website. I used Boston Butt roasts and rubbed them with sea salt. I covered them with foil and baked at 300 degrees for about 3 hours. The meat just fell apart and was totally yummy. We found another recipe after we had our luau and it said to rub the roasts with liquid smoke and then use the sea salt. That sounds really good so next time I will try it that way.


We tried teriyaki chicken and it was so good. I used boneless, skinless chicken thighs because that is what they use in restaurants. They turned out very good. I marinated them in teriyaki sauce for about 1 hour and then baked them in the oven until they were starting to brown. We used Mo Bettah's Teriyaki sauce for our dipping sauce. It's the best!


Friday, June 4, 2010

EGGS-Benedict-YUM!


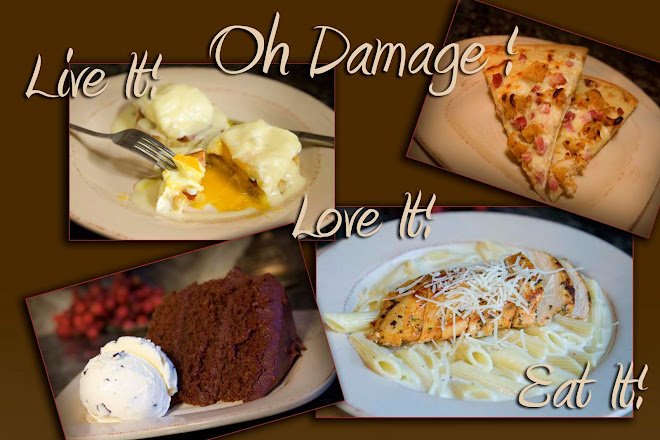
We loved Eggs Benedict. Natalie made these little jewels for my Mother's Day Breakfast. Needless to say, the were YUM!!! Natalie learned how to poach eggs on Google and found an easy Hollandaise sauce recipe. Hopefully you will want to try them out!


Eggs Benedict
Hollandaise Sauce
1/4 c melted butter
1 tbls flour
1 tsp salt
1/8 tsp pepper
Dash of cayenne pepper
1 c milk
1 egg yoke
1 tbls lemmon juice

Melt butter in small sauce pan. Blend in flour and seasonings, add milk gradually and stir. Cook until thickened, pour on slightly beaten egg yoke, add back into the sauce stirring constantly for one minute. Remove from heat, add lemon juice gradually and beat vigorously.

How to poach an egg:
1-Grease the bottom of the pan with vegetable oil.
2-Use a pan that is at least 3 inches deep, so there is enough water to cover the eggs and so they don't stick to the bottom of the pan.
3_Add 2 tbls vinegar and 2 tsp salt to the water and bring to a boil. Then reduce to a simmer before adding the eggs. Bubbles should not break the surface.
4-Break each egg into it's own saucer or cup.
5-Slip eggs carefully to simmering water by lowering the lip of each cup 1/2 in below the surface of the water. Let the eggs flow out.
6-Immediately cover with lid and turn off the heat.
7-Set timer for 4 minutes. Remove from water with slotted spoon.

To assemble
1-Toast 2 english muffins halved.(4 total)
2-Top with a slice of ham or canadian bacon heated.
3-Top with egg.
4-Cover with Hollandaise sauce

ENJOY!!